Key takeaways
If your pegboard hooks keep falling out, identify the panel and hook system before buying clips. A retainer must fit the actual panel and hook. It will not repair a damaged hole or make an overloaded hook stronger.
The useful first question is what moves when you take a tool down: the hook, the panel, or both. Remove the tools from the affected section before inspecting it. If the panel itself moves, bends at its fixings, or pulls away from the wall, stop using that section and check the panel installation instructions. A hook accessory cannot fix the panel mounting.
Start with a panel and hook compatibility check
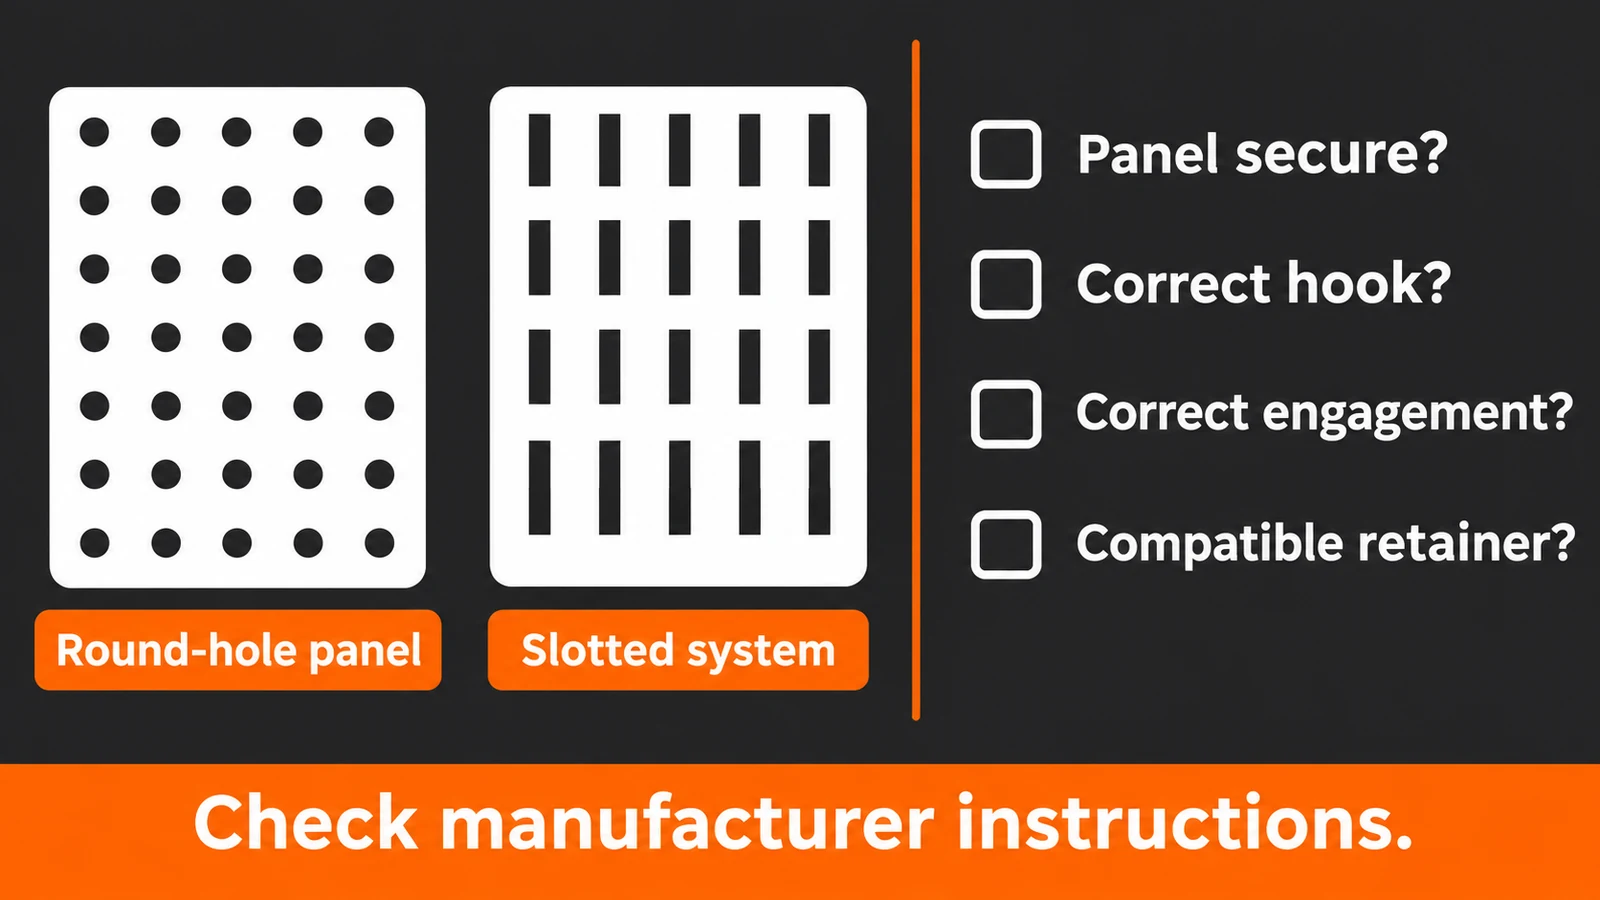
“Pegboard hook” describes several different products. Round-hole hardboard, plastic boards and proprietary slotted metal panels can look similar from across the garage. Check the panel’s label, purchase record or manufacturer documentation rather than choosing a replacement from a photograph.
Write down these details before shopping:
- The panel manufacturer and model, if known.
- Whether the accessory engages round holes, slots or another fitting.
- The stated hole size or slot specification and panel thickness.
- The hook model, including any supplied screw, clip or locking part.
- The manufacturer’s required space behind the panel.
Keep hole size and panel thickness as separate measurements. A listing that mentions a fraction without explaining what it measures is not enough to establish compatibility. If the board or hook cannot be identified, ask its supplier before hanging valuable or heavy tools from it.
Use the symptom to narrow the problem
| What happens | What to inspect | Next step |
|---|---|---|
| The hook comes away with the tool | Hook engagement, fit and the tool’s removal path | Check the correct installation and compatible retention options. |
| The hook will not sit as its instructions show | Panel type, thickness and rear clearance | Resolve the mismatch before adding a clip. |
| A normally fitting hook has become loose in one location | The hole or slot and the surrounding material | Unload that position and inspect for wear or damage. |
| The whole panel moves | Panel mounting and supporting surface | Stop using the affected section; inspect the installation. |
This is a troubleshooting sequence, not a test of load capacity. More than one problem can be present. For example, a hook may fit poorly and also need more clearance than the installation provides.
Choose a retainer for your exact system
For a compatible conventional hook, a maker-approved retaining clip or lock may be the smallest change needed. Read its installation instructions and check whether it is intended for the panel material and accessory you have. Do not assume every black plastic clip in a mixed kit works the same way.
Locking hooks are another option, but the product name alone does not establish fit. For example, Triton’s DuraHook page lists compatibility with its DuraBoard and specified pegboards while explicitly excluding steel pegboard for that range. That exclusion matters even when two panels appear to have similar holes.
Some metal panels accept more than one accessory format. Wall Control’s FAQ says its combo panels accommodate traditional 1/4-inch-diameter hooks as well as its slotted accessories. That diameter is 6.35 mm using the NIST inch definition. Check the exact panel and accessory; this example does not establish fit on another brand.
Before replacing every hook, confirm one candidate’s compatibility and instructions. Then assess the layout with the tools removed. Keep the packaging or product code so you can order the same fitting later instead of starting another mixed collection.
Give the tool room to come off the hook
A crowded layout can force you to twist a tool around neighboring handles or lift it into the hook. With the section unloaded, consider the path each item needs to leave its holder. Do the handles overlap? Does a shelf above restrict the movement the holder requires? Can you grasp the tool without pulling another item forward?
Reposition the accessories according to their instructions so each tool has a clear removal path. Place the tools you reach for most often where that motion is easiest. A less tightly packed panel can be more usable than one that holds every tool but makes each removal awkward.
For an unusual tool shape, a compatible cradle or dedicated holder may be a better choice than a single projecting hook. Check the accessory’s stated purpose and limitations. Do not add improvised extensions or combine ratings from separate parts into a new capacity claim.
Do not use a clip to hide panel damage
Inspect the unloaded board around the troublesome position. Enlarged holes, cracking, crumbling material or visible deformation need attention before the section returns to use. A clip that holds the hook in place does not establish that the surrounding panel remains sound.
If the panel’s condition or mounting is uncertain, leave the affected tools in a suitable drawer or case while you resolve it. Forcing a thicker hook into a damaged hole is not a documented repair. Follow the panel maker’s replacement or repair advice.
Work through one troublesome position before changing the whole wall
Consider this illustrative situation: a screwdriver holder stays seated until you take a tool from the crowded space beside it. That does not prove the holder is defective. First remove the surrounding tools and review how the accessory engages the board. Compare its position with the manufacturer’s installation drawing, including any supplied locking piece.
If the holder fits the documented system and the panel is sound, examine the space the tool needs during removal. You may be able to improve the arrangement by moving the neighboring accessory rather than adding another fixing. If the holder cannot sit correctly even when empty, stop there and resolve the fit instead.
Change one part of the arrangement at a time, following the relevant instructions. Replacing the hook, moving the neighboring shelf and adding a clip together makes it difficult to tell which problem you actually corrected. This is a method for organizing the inspection; it does not establish a safe working load.
Where the manufacturer calls for adjustment, use its actual procedure and tools. Keep the instructions beside the unloaded section. Do not copy an adjustment shown for a different panel or substitute an unspecified screw because it happens to fit through the opening.
Make a small compatibility record
After resolving the fit, record the panel model, accessory code and any compatible retainer in a note kept with spare parts. Add a close photograph of the installed accessory if it helps you distinguish similar fittings later. Keep unused parts in their original labeled bag rather than combining every clip in one jar.
When a supplier lists inches and your measuring tool displays millimeters, keep the original specification in the note and add a checked conversion separately. Do not choose an accessory merely because a converted measurement looks close. Hole shape, thickness, engagement and the maker’s compatibility statement still matter.
Before buying a set for the rest of the wall, list which tools actually need different holders. A dedicated screwdriver holder and a long hook for a coiled item solve different retrieval problems. Avoid turning a single loose-hook issue into an unnecessary replacement of accessories that already fit and work as intended.
For wider layout decisions, browse our tool walls and pegboards guides. Keep the compatibility record with the wall so future rearrangements start with known components.
Keep this inspection checklist with the spares
- Panel identified and mounting checked against its instructions.
- Hole or slot condition inspected with the affected position unloaded.
- Hook and retainer codes matched to documented compatibility.
- Required rear clearance and engagement checked.
- Tool removal path clear of neighboring handles and shelves.
- Instructions and spare parts stored together for the next rearrangement.
If any answer remains uncertain, keep that position unloaded while you obtain the missing product information. A completed checklist records your checks; it does not certify the wall or establish a load rating.
Related guides
Common questions
Should I glue hooks into the holes?
Start with a compatible retention accessory instead. Glue is not a substitute for a documented fit or installation method, and it can make future inspection and rearrangement harder. Use adhesive only if the relevant manufacturer explicitly specifies it for that assembly.
Does a locking hook hold more weight?
A locking feature and a load rating answer different questions. Use the stated limits for the exact panel, hook and installation. Retention by itself does not establish a higher capacity.
Do I need to replace the whole tool wall?
Not necessarily. Identify whether the issue is one incompatible accessory, a crowded position, a damaged location or the mounting itself. Fix the documented cause before deciding the entire system needs replacing.
Sources
- Wall Control: combo-panel accessory compatibility and installation-dependent capacity.
- Triton Products: DuraHook compatibility and exclusions.
- NIST: SI Units — Length, exact inch-to-millimeter relationship.
This researched guide presents an inspection workflow. It is not a hands-on accessory test or a certification of your installation.