Key takeaways
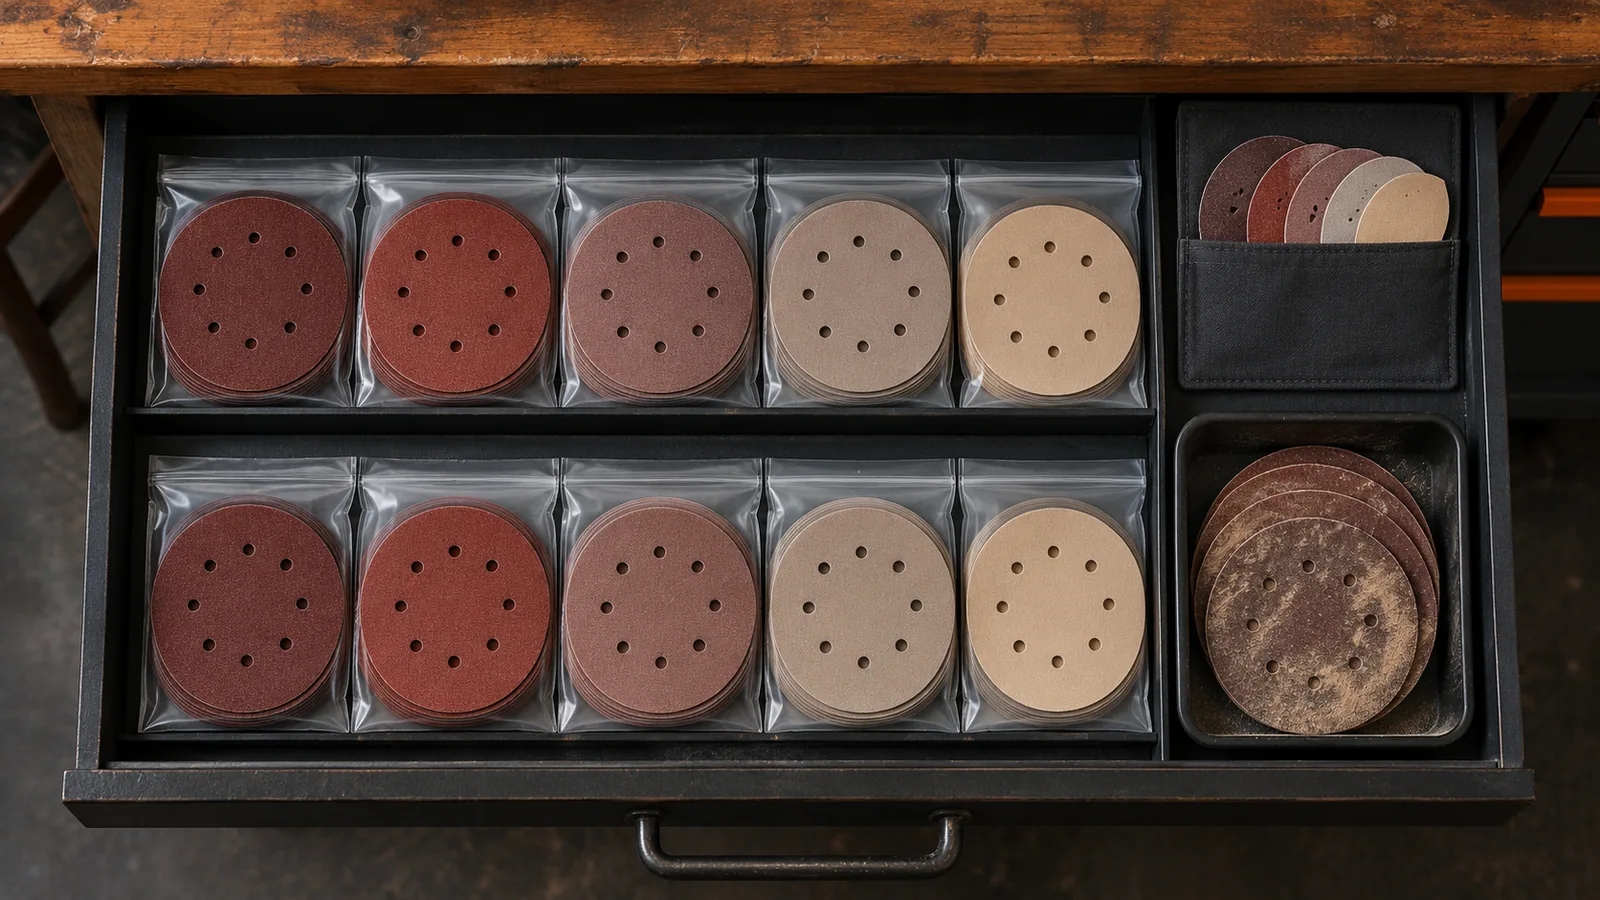
Good sanding disc storage keeps each product, size and grade identifiable, with unused discs separated from used ones. Start with the original packaging, choose compartments that support the discs without bending them, and retain the manufacturer’s storage instructions.
A pile sorted only by grit can still contain several incompatible products. The same drawer may hold different diameters, hole patterns, backings and abrasive ranges. Arrange those differences first, then put the grades in a readable order within each group.
Inventory the packs before choosing an organizer
Spread the unopened packs and identified loose discs across an area. Keep their labels with them. Make a list of the product families you actually use, including discs for different machines or backing pads.
Do not round a stated diameter to the nearest familiar size. Copy the exact package description, whether it uses millimeters or inches. Similarly, retain a grade prefix such as “P” where printed; a label saying only “120” discards information from the original pack.
As a label-checking example, 5 in converts arithmetically to 127 mm using the NIST inch definition. Do not rename a package marked 125 mm as 5 in on that basis. Preserve its actual size and the maker’s compatibility information.
Use the following fields for each group:
- Manufacturer and product range or code.
- Stated diameter or shape.
- Backing or attachment type.
- Hole pattern or other stated compatibility information.
- Full abrasive grade marking.
- Unused stock or used stock awaiting inspection.
If a disc cannot be identified reliably, do not add it to a confidently labeled stack. Put it aside for identification or disposal appropriate to its condition and previous use. Guessing a grade by feel defeats the point of organizing it.
Choose a flat storage format that fits the available space
You do not have to build a dispenser to improve this drawer. Start by seeing whether the original packs fit inside a shallow tray or small box. An organizer should make the labels visible without requiring you to handle every disc.
| Format | Useful when | What to check |
|---|---|---|
| Original packs in a divided tray | You have a modest range and want to retain product information. | Pack edges are supported and the drawer closes without crushing them. |
| Individual flat folders or envelopes | Several grades need separation in a shallow drawer. | Discs fit without folded edges and labels remain attached. |
| Stackable trays | You need to separate product families as well as grades. | The lower trays can be reached without disturbing the whole stack. |
| A purpose-made rack or dispenser | You regularly reach for a known disc family at one station. | It is designed for those actual discs and does not conceal their identity. |
Try the arrangement using empty packaging before making permanent dividers. Check the largest actual pack, not just one loose disc. A drawer that accommodates the disc but tears the label off its bag is solving the wrong problem.
Separate used discs from unused stock
Reserve a clearly named used-disc section. This is a place to hold identified items for inspection, not an automatic approval to reuse everything that reaches it. Do not slide a previously used disc between clean, unused discs simply because the grade matches.
Record the previous material where known, along with the product information you retained. If its history or contamination is uncertain, do not present it as ready for a clean finishing job. Follow the abrasive manufacturer’s requirements for inspection and suitability rather than trying to recover every piece.
Keep rejected pieces out of the usable inventory. “Used,” “unidentified” and “discard” should not become the same overflowing tray. Disposal depends on what is on the abrasive as well as the abrasive itself; this storage system does not determine how contaminated material should be discarded.
A simple drawer layout you can copy
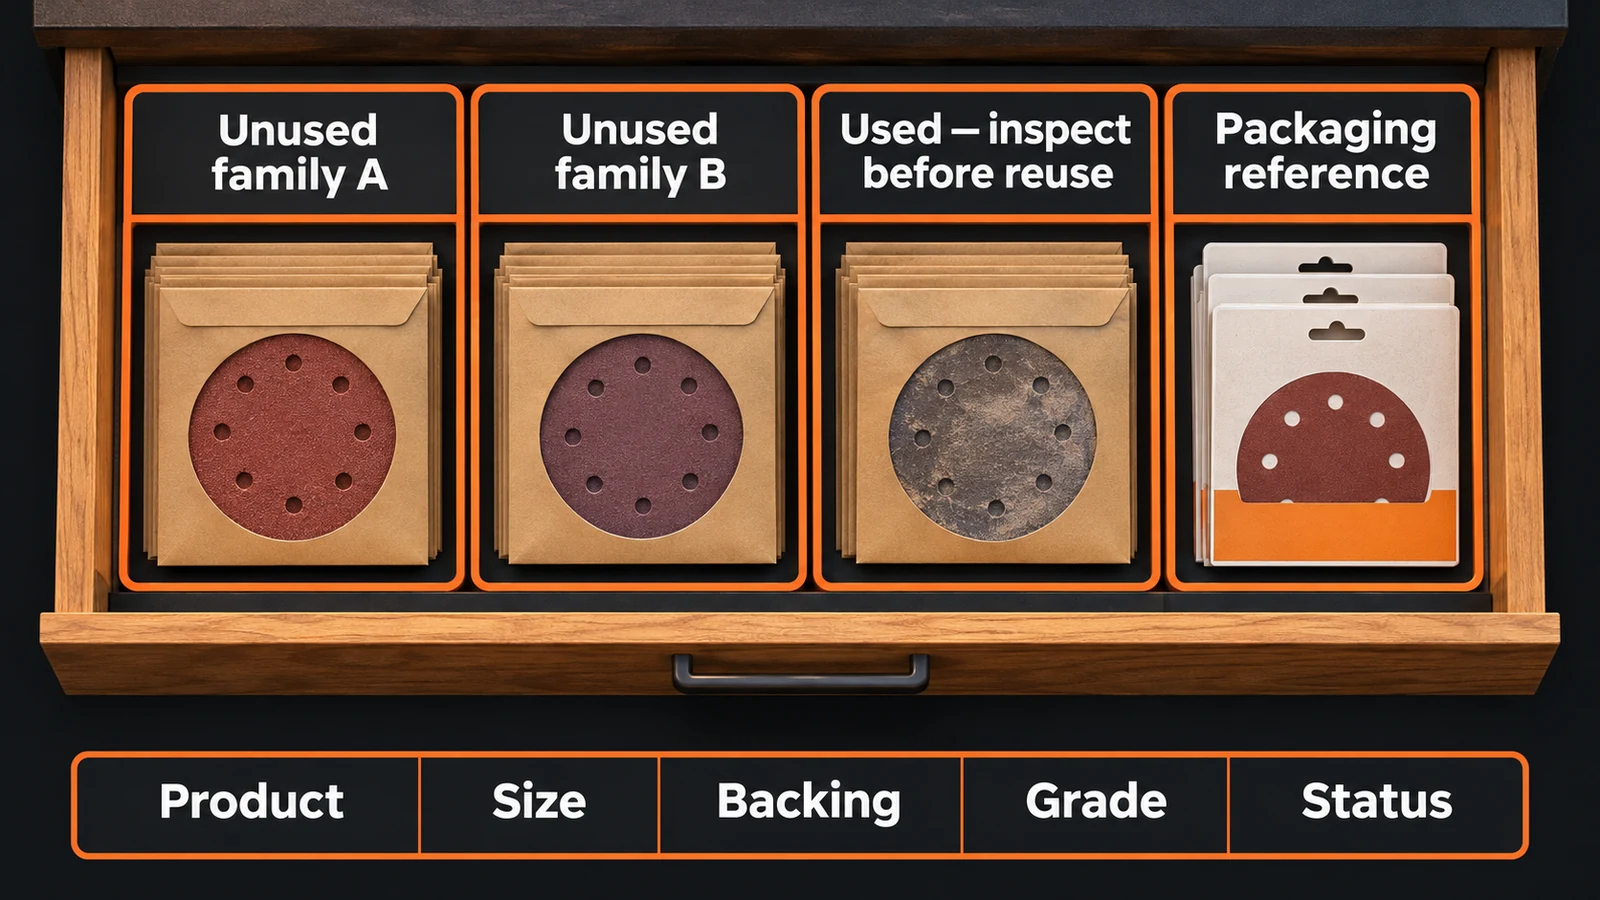
Give one row to each product family, then use labeled compartments for its exact grades. Put unused stock together and place the used-disc section in a clearly separate area. Keep a packaging-information pocket or folder with the drawer.
For example, a conceptual drawer could have two unused-stock rows for two different disc families and a separate inspection tray at the front. The row count is only an example. If you use one family, do not add a second row merely to imitate a diagram.
Make each label readable from the position in which you open the drawer. Avoid placing the only label underneath the stack. Leave enough room to grasp the package without bending the discs to lift it out.
Copy this label format
| Label line | Entry |
|---|---|
| Product | Brand / range / product code |
| Fit | Exact stated size / backing / hole pattern |
| Grade | Full marking from the pack |
| Stock status | Unused / used, inspect before reuse |
| History, when used | Known previous material; do not guess missing information |
This template deliberately leaves grade choices blank. A storage order is not a sanding sequence, and an organizer should not imply which abrasive is right for a particular finish.
Check whether the garage is a suitable storage location
A tidy organizer cannot compensate for unsuitable conditions. Mirka’s abrasive-storage guidance calls for dry, frost-free storage without large temperature swings. Check the directions for your own product rather than assuming every abrasive has identical requirements.
If the garage cannot provide the specified conditions, consider keeping abrasive stock in a more suitable indoor location and bringing out the identified products needed for the job. Keep the original storage information with the stock so the next refill does not lose it.
Example: two disc families in one shallow drawer
Suppose you have two identified abrasive ranges and several grades within each. Keep the unopened packs from the first range together in one row and the second range in another. Within each row, order the packs by their actual grade markings so you can scan them without pulling out the whole collection.
Use a separate lift-out tray for identified used discs awaiting inspection. Label that tray clearly rather than relying only on a different color. The packages and tray should remain understandable when removed from the drawer; an empty space on the drawer base cannot identify something you carried to the bench.
This is an illustrative arrangement, not a fixed-size cabinet plan. Lay the actual packages on paper in the available drawer before choosing dividers. Include the space needed for your fingers and the drawer runners or lid. Keep the fit generous enough that you are not folding a package to squeeze it between partitions.
If the stock is stored indoors but the work happens in the garage, a labeled portable container may be more practical than a fixed dispenser. Bring only the identified stock needed for the task, then return it to its specified storage conditions. The portable container is a transport arrangement, not a substitute for the product’s environmental requirements.
Refill without losing product information
When a new pack arrives, check the full product description before placing it behind older stock. A familiar-looking package or matching grade number does not establish that the product range, backing and fit are identical. Keep the new packaging if those details differ.
Where a seller uses inches and another uses millimeters, retain the exact stated size from each pack. Do not rename different products with a single rounded label just to make the drawer look tidy. The same applies to labels on replacement backing pads: storage categories do not determine tool compatibility.
Review labels when the drawer changes, not only when it becomes untidy. If a product family is no longer used, reassign its empty compartment and replace the label. A small collection with a readable system is more useful than a large rack full of obsolete names.
For related organizer choices, see our DIY workshop storage guides. Keep any future build plan subordinate to the actual packaging and storage requirements rather than forcing your inventory into a decorative design.
Check the drawer after a refill
- Can you read the product name and full grade without lifting every pack?
- Does each label travel with its package or removable tray?
- Is the used-disc section clearly separate from unused stock?
- Can you close the drawer without pressing on the packs?
- Are storage instructions still accessible when the original box is empty?
If a refill no longer fits, keep its labeled pack in a named reserve location. Add that location to the drawer note instead of squeezing more discs into an already awkward compartment.
Related guides
Common questions
Can several brands share a compartment?
Keep each product identifiable. Separate packs can share a larger tray if their labels remain clear, but do not merge loose discs solely because the grade numbers look the same.
Should I remove a self-adhesive disc from the sander?
Follow the sander and abrasive instructions for that combination. This organizer does not replace product-specific removal, liner or storage directions.
Does an organizer extend a disc’s shelf life?
This guide makes no shelf-life claim. An organizer helps retain identity and separate stock; follow the abrasive maker’s storage, condition and any date-related requirements for the exact product.
Sources
The drawer and label examples are proposed organization methods. No storage-life, sanding-performance or product comparison test was conducted.