Key takeaways
To organize loose drill bits, separate them by type, identify the size markings, and give each confirmed size a labeled home. Keep uncertain bits in a separate compartment. An empty slot is better than a confident-looking label on the wrong bit.
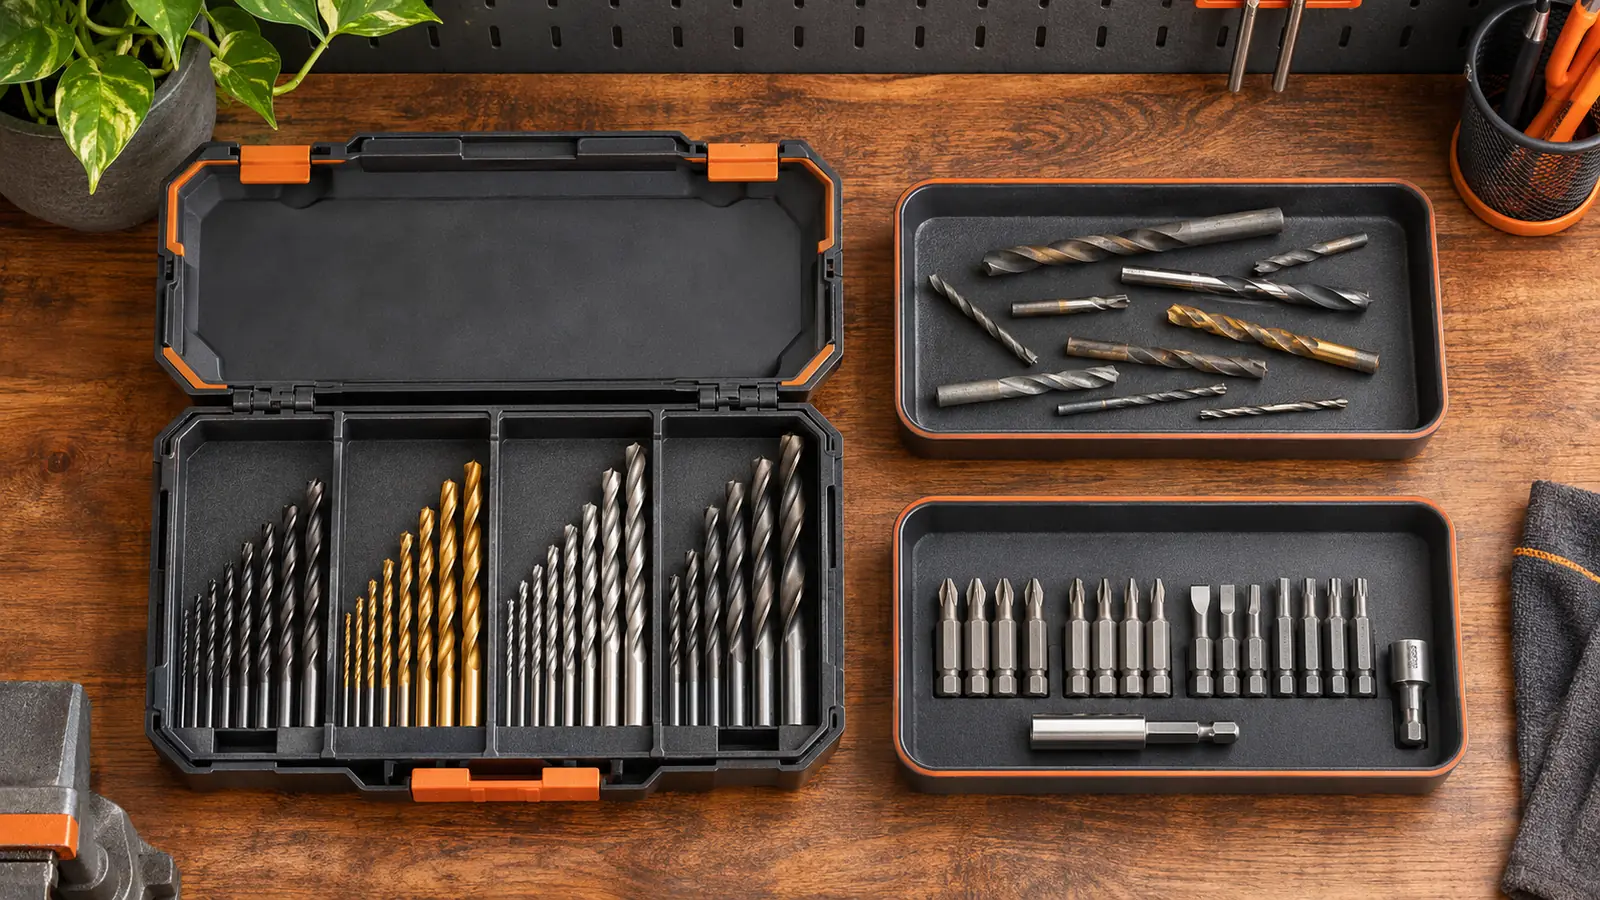
You do not need a new bit set to fix a drawer full of loose pieces. Start with the cases, trays and packaging you already have. The goal is to find a known bit and return it to the same place without turning storage into another project.
Gather the collection without mixing it further
Clear a section of the bench and use shallow trays so individual pieces stay visible. Bring over the loose bits, partly empty cases and original sleeves. Keep anything already in an identified set together while you inspect the rest.
Do not empty several labeled cases into one pile just to make the sorting look consistent. Their labels are useful information. Photograph an original label before separating it from its contents, and keep the model or product code if it helps identify the set later.
Set visibly damaged pieces aside for assessment rather than putting them into the ready-to-use collection. This guide covers organization, not sharpening, repair or deciding whether an unidentified bit is suitable for a particular material.
Sort by tool type before sorting by size
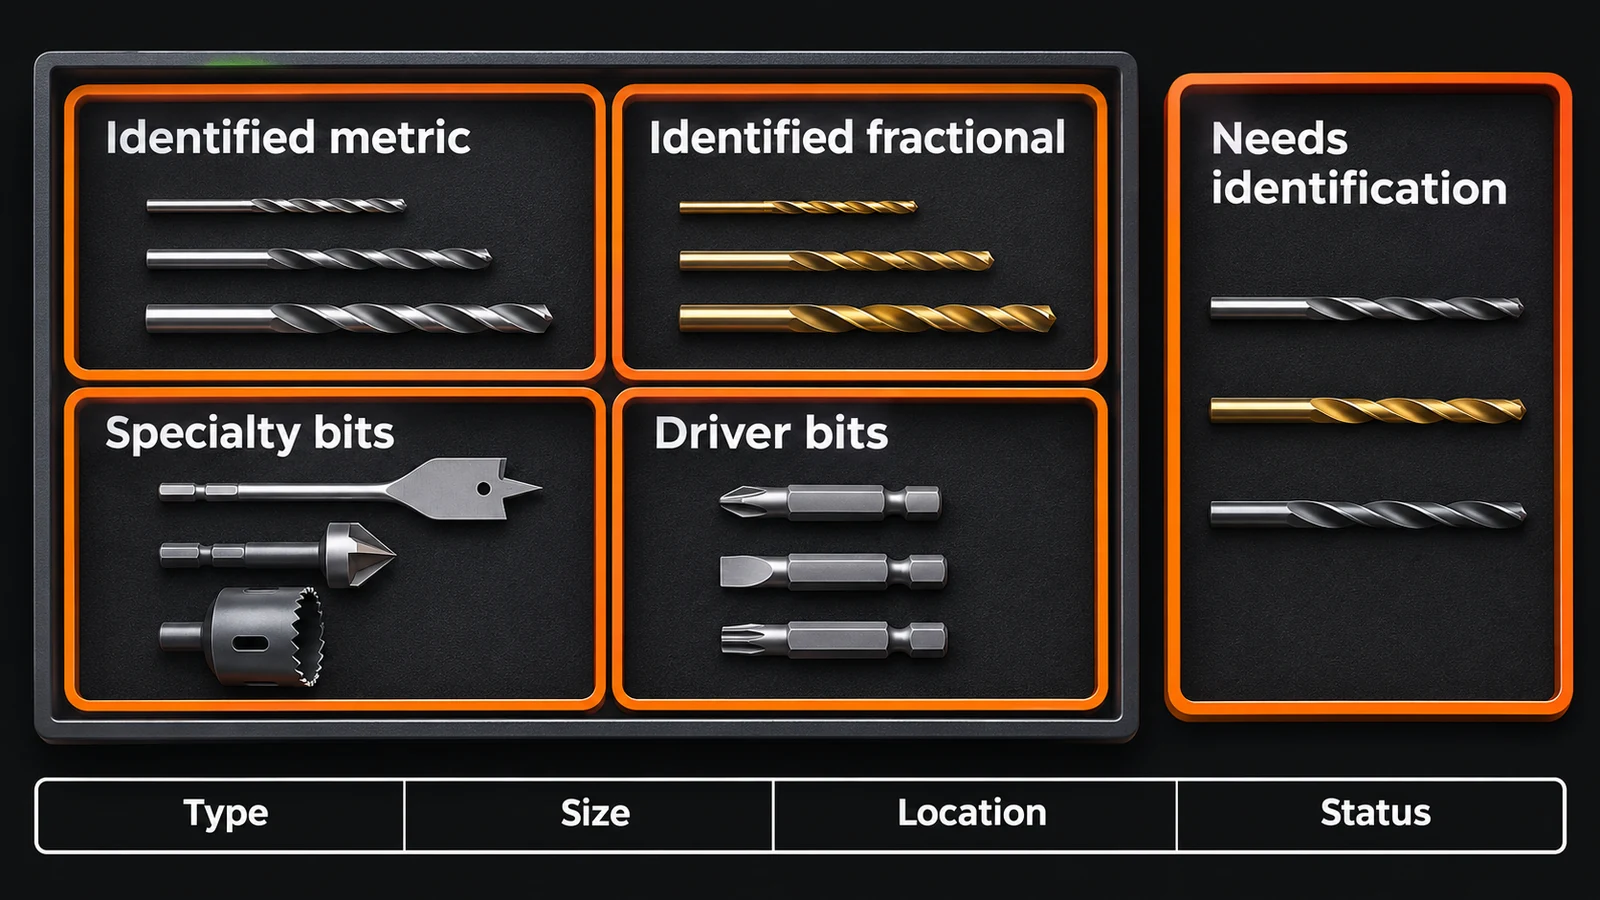
Create temporary groups for the kinds of accessories you can confidently identify. A small workshop might have ordinary twist drills, masonry bits, wood-boring bits and driver bits. A compact collection may need only two or three groups; there is no benefit in creating empty categories.
Keep driver bits separate from drilling bits even when they fit the same storage case. For the driver group, preserve the marked drive type and size. For drilling bits, preserve the marked diameter and any product information describing their intended use.
If you are uncertain what a piece is, put it in a clearly marked identification tray. Color alone is not a dependable inventory label. Do not turn an uncertain visual guess into an instruction to use that accessory on wood, masonry or metal.
Keep metric, fractional and other size systems distinct
Read the markings under good light before assigning a slot. Separate metric sizes from fractional-inch sizes. Numbered and lettered drill sizes also need their own labels rather than being forced into the nearest fractional position.
The storage market reflects these distinctions: Huot’s 2024 catalog describes metric indexes and combination indexes containing fractional, letter and wire-gauge sizes. Choose the actual range and size sequence you own, not simply a case with enough holes.
A caliper or suitable drill-size gauge can help investigate an unmarked piece, but this is not a reason to guess between close nominal sizes. Record the marking and the measurement separately rather than treating a quick reading as a confirmed nominal size. If the result remains uncertain, label it “size unconfirmed” and keep it out of confirmed slots.
Never force a bit into a gauge hole or a case position. Storage should not require pushing on a cutting edge. Where a case has a specified bit length or shank requirement, check that as well as the nominal diameter.
For a size-label example, 1/4 in converts to 6.35 mm using the NIST definition of the inch. Keep a bit marked 6 mm in its own position. The conversion explains a label; it does not make those two marked sizes interchangeable.
Match the storage format to the collection
| Your collection | A practical starting point | Check before committing |
|---|---|---|
| A mostly complete identified set | Its original index or case | Labels are readable and pieces fit without forcing. |
| Loose bits in a known size sequence | An empty index matching that sequence | Size range, spacing and supported bit length. |
| A few mixed specialty bits | Divided tray or individual labeled sleeves | Enough room to separate pieces and retrieve them comfortably. |
| Duplicates of frequently used sizes | A separate labeled refill compartment | The main case remains readable and closes properly. |
| Unidentified pieces | A dedicated identification compartment | They cannot be mistaken for confirmed inventory. |
Make the container easy to use and label
A drawer tray is often a useful first arrangement because you can change it without building a rack. Place the case or tray in its proposed home and open it fully. Check whether a lid catches a shelf, whether the handle blocks the drawer and whether you can lift out the smallest pieces without emptying their neighbors.
For a wooden holder, lay out the confirmed inventory on paper first. Do not drill a large bank of holes merely because a plan includes them. A holder for a different size sequence may leave you with many empty positions and nowhere appropriate for the bits you use.
Copy this inventory label
Use the same field order on every container. These are fill-in labels, not declarations about the bits in your drawer.
| Field | What to record |
|---|---|
| Type or original product name | Use a confirmed identification; otherwise write “unidentified.” |
| Size and system | Copy the original marking, including units or size designation. |
| Location | Your case, drawer or tray name. |
| Status | Identified, needs identification, or set aside for assessment. |
| Product reference | Brand/model or packaging reference, when available. |
For example, an illustrative label could read “Twist drill / 6 mm / drawer A / identified / original pack retained.” Use it only as a format. It does not identify an unknown bit or establish what that bit can drill.
Make returns easier than leaving bits on the bench
Store the everyday case near where you collect drilling accessories, while protecting it from the workshop conditions its maker warns against. Keep the lid accessible and labels facing the opening direction. Put infrequently used specialty items in another clearly named section rather than burying the regular set.
At the end of a job, return confirmed pieces to their positions. If a marking has become unreadable or you are no longer sure which slot is correct, use the identification compartment. Do not undo the system by putting it in the closest empty hole.
Apply the same location names when you organize screws and nails: a consistent drawer label is more useful than a separate naming system for every accessory.
Example: one working case and one refill tray
Imagine a small collection containing a partly complete identified metric set, several confirmed duplicates, a few specialty bits in original sleeves and some pieces with unreadable markings. You do not need to replace the whole collection with a larger matched set to organize it.
Keep the metric set in its existing case if it still fits correctly. Put its confirmed duplicates in a labeled refill tray. Retain the specialty sleeves in their own section so their product names remain attached. Finally, give the unreadable pieces a separate identification compartment. This example describes a proposed arrangement, not a collection we tested.
Choose location labels you can say and write easily: “working case,” “refills” and “specialty” are sufficient if there is only one of each. Add drawer letters only when another similar location makes them necessary. An elaborate numbering system can become another thing to maintain.
Before committing, picture the end of a typical job. Can you find the right case, see the empty position and return the bit without moving another container? If not, revise the arrangement while it is still a few trays. Do not build permanent dividers around an awkward workflow.
Keep the inventory useful when the collection changes
When a new pack arrives, check whether it replaces an existing size or introduces a different type. Keep its original identification before making a new label. Retire obsolete location notes rather than leaving two different drawer names attached to the same product.
For a workshop using both measurement systems, record the original marking first. A conversion is a reference, not a reason to merge nominal sizes or substitute one bit for another. Keep supplier descriptions and any special shank or length requirements with the item.
Our small-tool and hardware storage guides use the same principle: preserve confirmed identity, then build storage around it.
Related guides
Common questions
Should duplicates share one slot?
Only if the container is designed to hold them that way. Otherwise keep the working set readable and put confirmed duplicates in a labeled refill section.
What should I buy first?
Nothing until the inventory is sorted. If an existing case works, retain it. Buy an empty index or tray only after confirming the sizes, lengths and types it must accommodate.
Can metric and fractional bits share one case?
A suitable combination case can hold both, but each system needs clearly identified positions. Sharing a case should not mean assigning a metric bit to an approximately matching inch-size slot.
Sources
- Huot Manufacturing: 2024 catalog, drill indexes, printed pages 33–34.
- NIST: SI Units — Length, exact inch-to-millimeter relationship.
The inventory template and example workflow are editorial recommendations, not a product test or a method for certifying an unknown bit.